|
|
|
|
|
|
ItSpace is an online sound installation that launched on November 15, 2007. The online version consists of pages within
the social networking site MySpace. Instead of featuring people,
the pages feature everyday household objects. Each page has a photo of the object, a description, and most importantly,
a 1-minute piece of music composed of recordings of the object being struck and resonated in various ways.
In December of 2007, I was invited to create a physical version of the piece for display at
The Bridge Public Arts Initiative, a local gallery in Charlottesville, Virginia. This page documents
the process of building the physical version of ItSpace and installing it at The Bridge. From time to time, it may be updated with photos of
installations at other locations, should they come about.
|
|
Making It
|
|
The photos below show, sequentially, the process of putting the installation together.
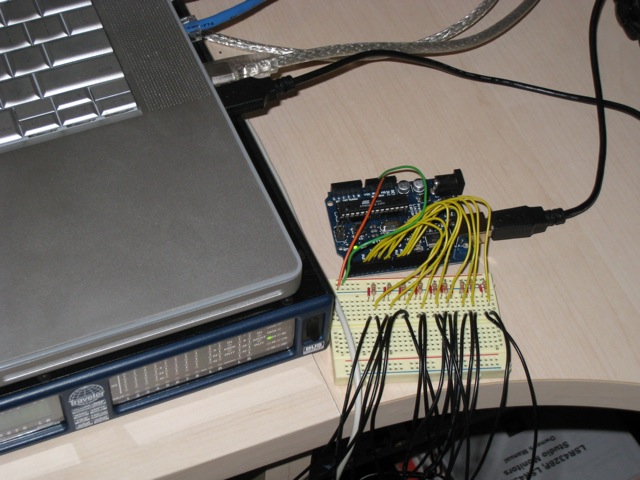
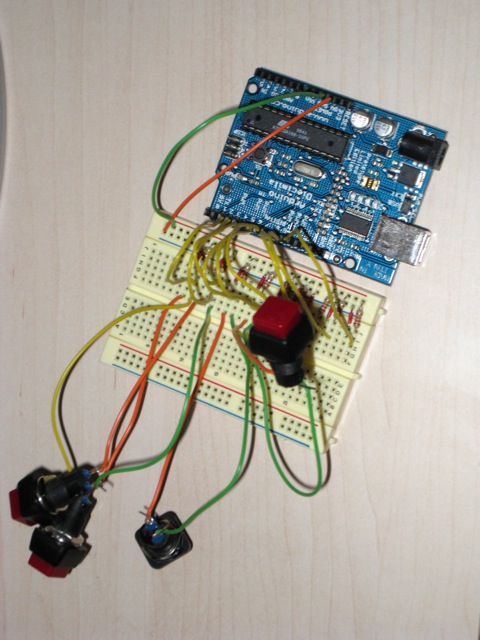 A closeup of the Arduino microcontroller wired to a breadboard. Attached to the
breadboard are four of the pushbuttons. This setup was used to test the Arduino and make sure button pushes were detected. A closeup of the Arduino microcontroller wired to a breadboard. Attached to the
breadboard are four of the pushbuttons. This setup was used to test the Arduino and make sure button pushes were detected.
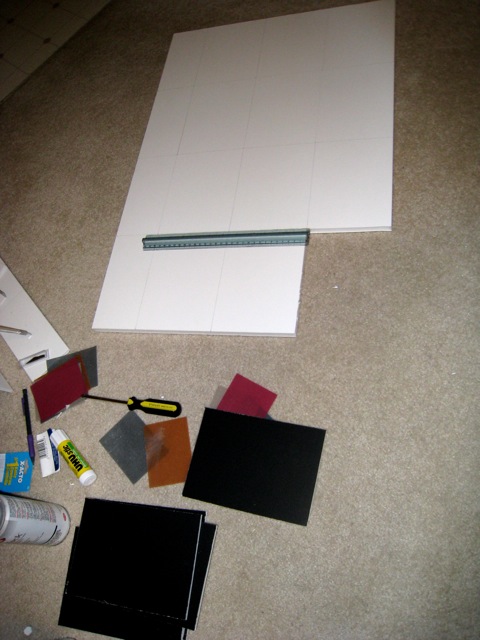 Black and white foam core board was sandwiched together to create the backing for
the photos. The finished backing needed to be thick enough to enclose the length of the button, allowing only the two leads to
protrude from the back. Black and white foam core board was sandwiched together to create the backing for
the photos. The finished backing needed to be thick enough to enclose the length of the button, allowing only the two leads to
protrude from the back.
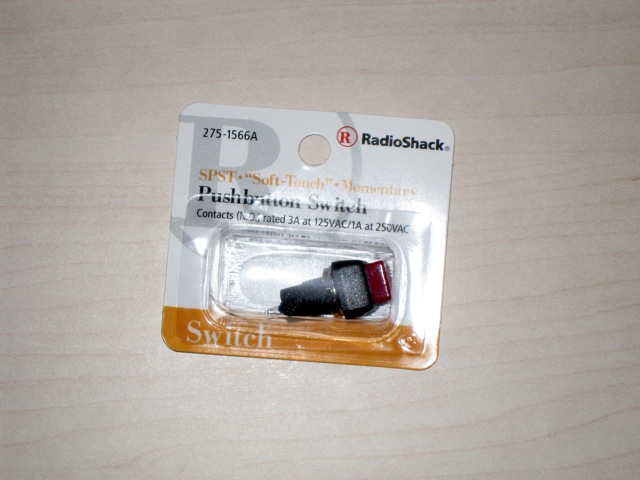 The button, an SPST (single pole, single throw) Momentary Pushbutton switch,
available from radio shack. A momentary button only closes the circuit when pressure is applied. As soon as pressure is released,
the circuit is open. Other types of pushbuttons may 'click', when pressed, keeping the circuit closed after pressure is released.
The 'momentary' effect was what was desired for this project. The button, an SPST (single pole, single throw) Momentary Pushbutton switch,
available from radio shack. A momentary button only closes the circuit when pressure is applied. As soon as pressure is released,
the circuit is open. Other types of pushbuttons may 'click', when pressed, keeping the circuit closed after pressure is released.
The 'momentary' effect was what was desired for this project.
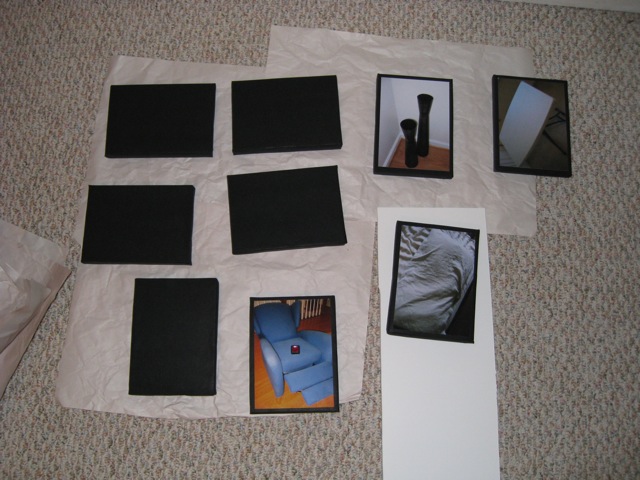 The original photo backings were not aesthetically pleasing, as the white foam core
was visible around the edges. To acheive a cleaner look, I wrapped the finished backings in a black wrapping paper, then spraypainted
them with semi-matte black spraypaint. The backs of the photos were sprayed with a spray-on adhesive that made them tacky. They could
then be pressed on to the backings, but also removed and repositioned if necessary, much like a post-it note. The original photo backings were not aesthetically pleasing, as the white foam core
was visible around the edges. To acheive a cleaner look, I wrapped the finished backings in a black wrapping paper, then spraypainted
them with semi-matte black spraypaint. The backs of the photos were sprayed with a spray-on adhesive that made them tacky. They could
then be pressed on to the backings, but also removed and repositioned if necessary, much like a post-it note.
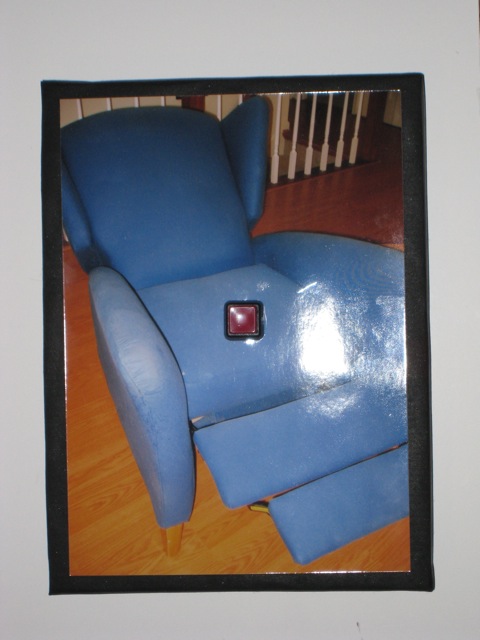 A partly finished construction, with a button inserted through the photo. I decided
it would be more in keeping with the spirit of the piece to embed the buttons directly into the photos of the objects, rather than
having them all sit below the photos. People then feel like they are 'touching' the object, but of course, they are not. It is, in some
ways, a simulation of a mouse click on a link - interactivity is limited, real choice and control are illusions. A partly finished construction, with a button inserted through the photo. I decided
it would be more in keeping with the spirit of the piece to embed the buttons directly into the photos of the objects, rather than
having them all sit below the photos. People then feel like they are 'touching' the object, but of course, they are not. It is, in some
ways, a simulation of a mouse click on a link - interactivity is limited, real choice and control are illusions.
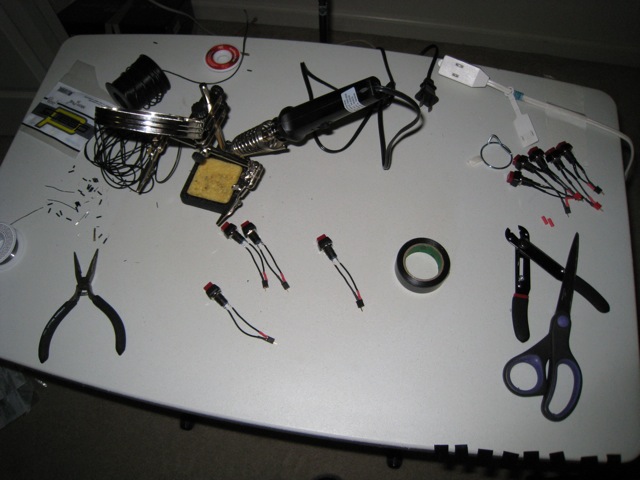 The soldering table with partly completed button constructions. The soldering table with partly completed button constructions.
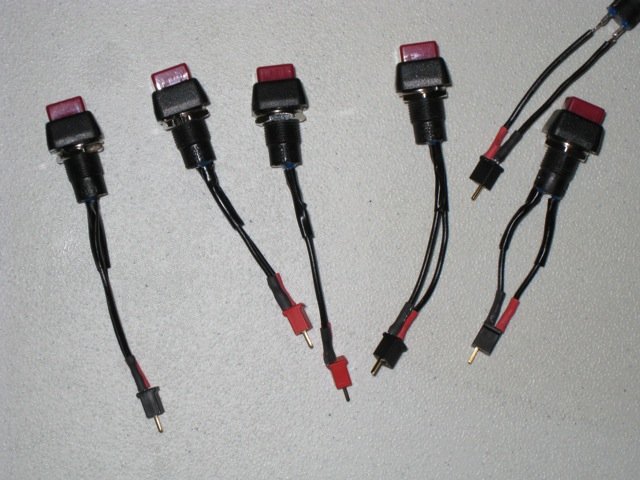 I soldered a few inches of wire and two-pole microplugs (available in the RC racing section of your local
hobby shop) to the leads on the back of each buttons. Once the button is embedded in the photo board, the plug sticks out the back. It can then be plugged
into or unplugged from the longer wires that run to the breadboard. This was done primarily for portability. I soldered a few inches of wire and two-pole microplugs (available in the RC racing section of your local
hobby shop) to the leads on the back of each buttons. Once the button is embedded in the photo board, the plug sticks out the back. It can then be plugged
into or unplugged from the longer wires that run to the breadboard. This was done primarily for portability.
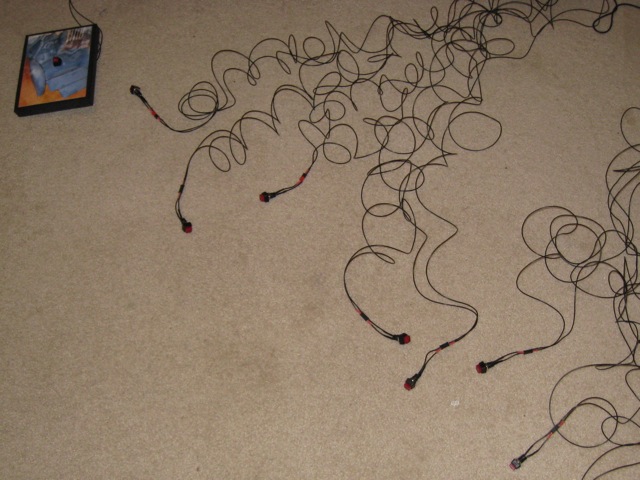 Buttons plugged into the longer wires that run to the breadboard. This was done for testing before the
rest of the photo boards were completed. Buttons plugged into the longer wires that run to the breadboard. This was done for testing before the
rest of the photo boards were completed.
 The ends of the longer wires (around 10'), running into the breadboard. The Arduino is connected via USB
to a computer. The USB is both the data pipe and the power source for the Arduino. The ends of the longer wires (around 10'), running into the breadboard. The Arduino is connected via USB
to a computer. The USB is both the data pipe and the power source for the Arduino.
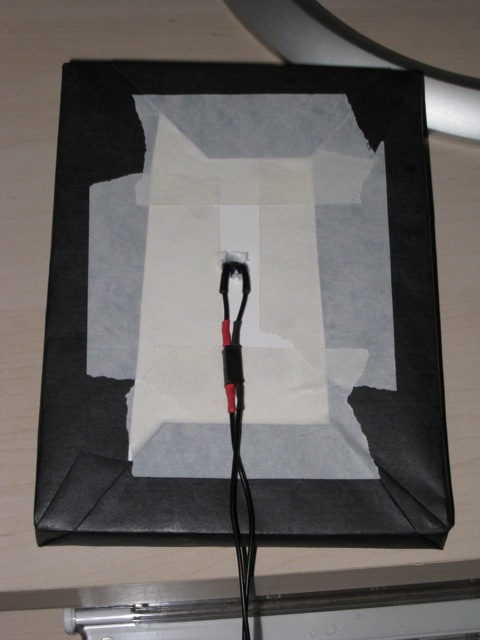 The back of one of the photo boards, showing a connected plug. The back of one of the photo boards, showing a connected plug.
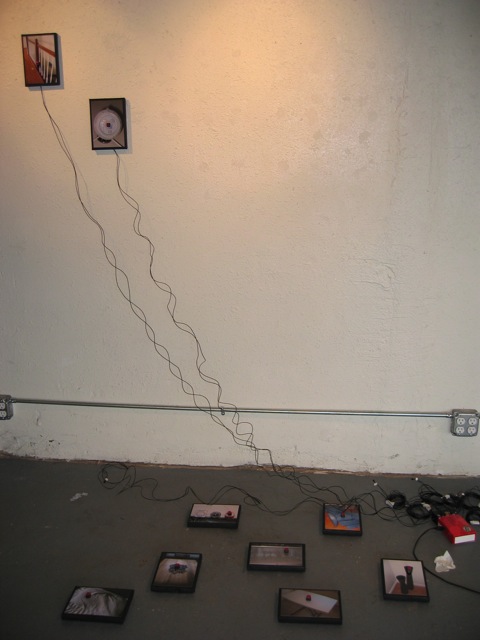
 A layout of the photo boards that mimics the layout of the thumbnail images of the ItSpace objects on the
original ItSpace webpage. A layout of the photo boards that mimics the layout of the thumbnail images of the ItSpace objects on the
original ItSpace webpage.
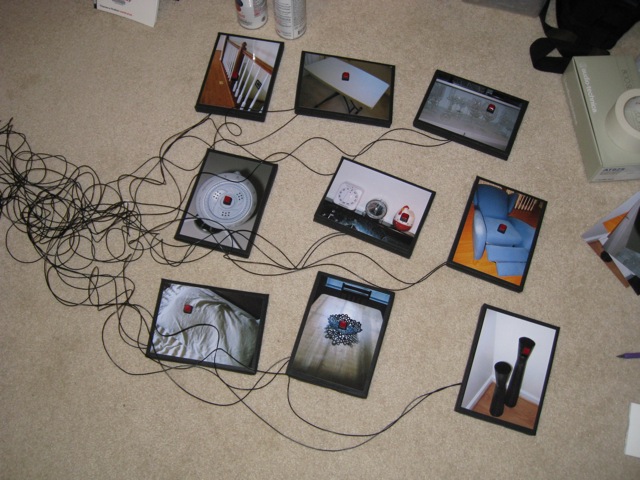 The photo boards plugged in for testing. The photo boards plugged in for testing.
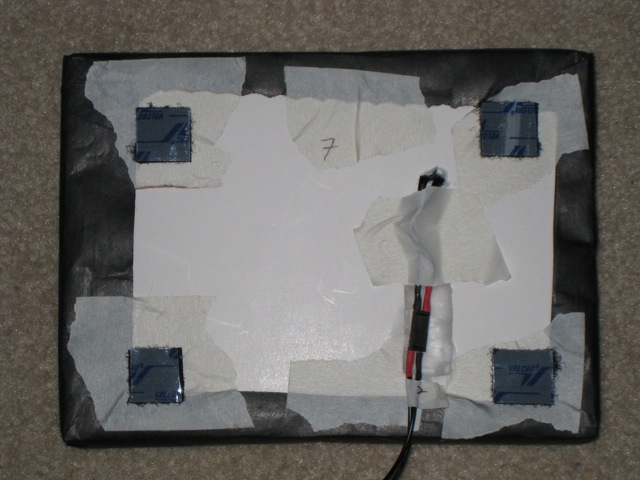 Velcro was used to attach the boards to the gallery wall. This turned out to not be a great solution as
as the adhesive of the velcro to the back of the board is stronger than the bond within the velcro itself (meaning you can damage the board by pulling it
off the wall if not careful). Also, a cavity needed to be carved into the back of each photo board to prevent the plug assembly from protruding
farther than the velcro pieces. The boards and corresponding cables were also numbered so as to speed up installation - each board needs to go to a specific
cable in order to trigger the matching sound set in the software. Velcro was used to attach the boards to the gallery wall. This turned out to not be a great solution as
as the adhesive of the velcro to the back of the board is stronger than the bond within the velcro itself (meaning you can damage the board by pulling it
off the wall if not careful). Also, a cavity needed to be carved into the back of each photo board to prevent the plug assembly from protruding
farther than the velcro pieces. The boards and corresponding cables were also numbered so as to speed up installation - each board needs to go to a specific
cable in order to trigger the matching sound set in the software.
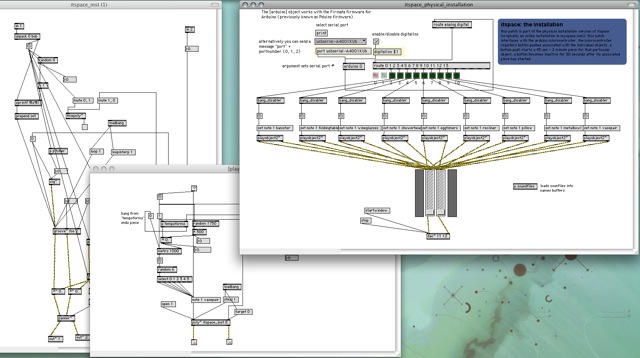 A screenshot of the Max/MSP patch (or program) that actually produces the sound for the installation.
The Arduino microcontroller registers the button clicks and sends that information on to the computer (via the USB connection). The Max/MSP software takes that
incoming data and uses it to trigger a sound process for that particular object. Unlike the online version of ItSpace, the physical version creates a realtime
remix of the piece for each object. Each piece is 45 seconds to two minutes long. Multiple objects can be triggered simultaneously, so visitors to the installation
can mix objects in into combinations of their choice. A screenshot of the Max/MSP patch (or program) that actually produces the sound for the installation.
The Arduino microcontroller registers the button clicks and sends that information on to the computer (via the USB connection). The Max/MSP software takes that
incoming data and uses it to trigger a sound process for that particular object. Unlike the online version of ItSpace, the physical version creates a realtime
remix of the piece for each object. Each piece is 45 seconds to two minutes long. Multiple objects can be triggered simultaneously, so visitors to the installation
can mix objects in into combinations of their choice.
 Putting the photo boards up on the wall. I decided not to go with the grid layout previewed while testing. Putting the photo boards up on the wall. I decided not to go with the grid layout previewed while testing.
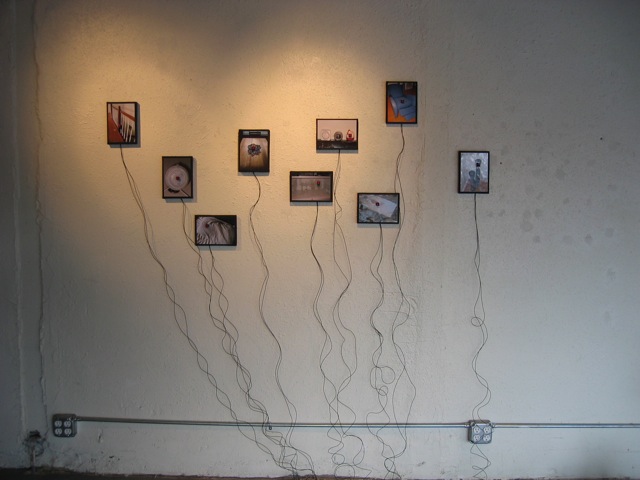 The final layout. The final layout.
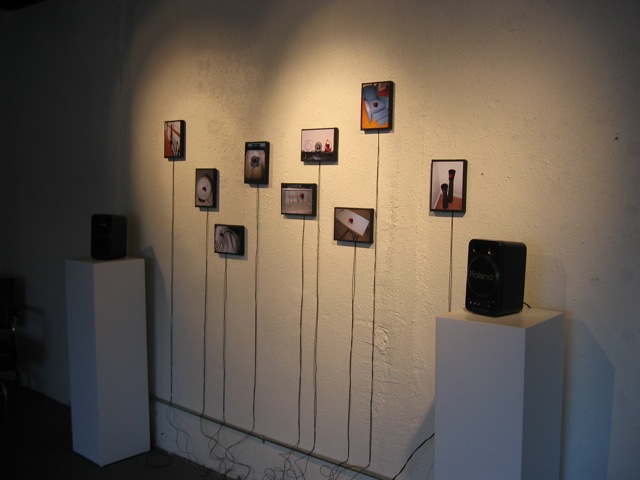 Once the boards were attached to the wall, small staples were hammered into the wall at the bottom to hold
the wires straight. The computer, microcontroller, power supplies, and excess wire were covered with a small white box custom made for the installation by
Zack Worrell of The Bridge. Once the boards were attached to the wall, small staples were hammered into the wall at the bottom to hold
the wires straight. The computer, microcontroller, power supplies, and excess wire were covered with a small white box custom made for the installation by
Zack Worrell of The Bridge.
|
|
|